Unity Cinemachine + Timeline Tutorial
Unity has some major features regarding handling animation and Cinemachine and Timeline are modules that will give you the tools to create cinematics in your game, camera switching, custom mini-animations, or whole projects that are just animation like The Heretic short film.

In this tutorial, we are going to create the basics of a little cinematic animation, using Cinemachine and Timeline with 3 different shots and angles to familiarize with the process.
You can think of Timeline like where all the planification of the shot takes place, it handles the animation events, can trigger sounds, keep track of changes and switches the objects, and can be used to interpolate between changes in the camera for smoother transitions.
Cinemachine it’s a set of tools that enhance the Unity cameras with different features, make them dynamic, smart and without the need of adding extra code, and works great with timeline out of the box too!
You can follow along to create your first project with Cinemachine and Timeline, or you can download my repository to see how it was implemented.
Creating a cinematic
First, let’s open Unity, we are going to create a new empty 3D project.
Then, we need to enable Cinemachine and timeline for your new project. By going to Window > Package Manager, and make sure that Timeline and Cinemachine are “Selected” on the right checkbox, any version should work, but I would recommend the latest stable.
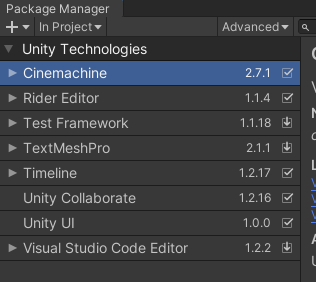
If you don’ see Cinemachine at first, you can search the package in the “in Project” tab, and change it to “Unity Registry” that will make the other optional packages to show up, and you can search for Cinemachine from the list.
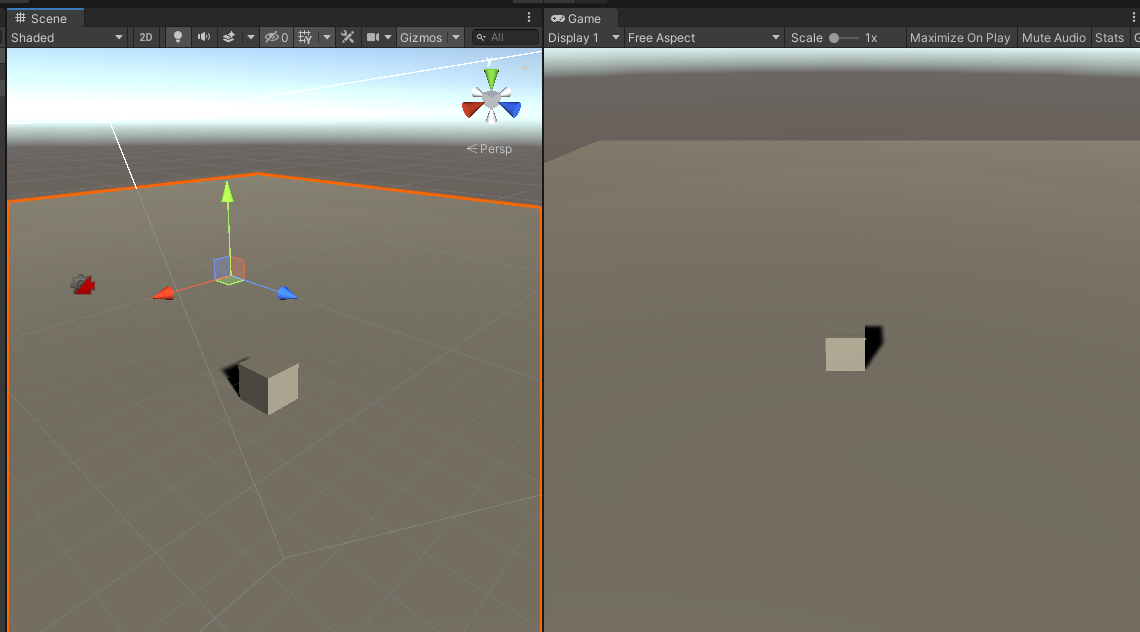
After this, and since we were going to upload our project to Github, I decide to not use assets that I didn’t have the license to re-publish in other platforms, so today’s example it’s going to be with a 3D cube , so let’s add a 3D cube to our scene, by right clicking the Hierarchy window and select 3D object > Cube.
I ended up adding a 3D Object > Plane too, just to give a little more of sense and I scale it up to look like a ground where the 3D cube will be on.
The hero of our next big hit
Let’s re-name our cube by right-clicking the cube and selecting “Rename”, I rename it to “AnimatedCube”.
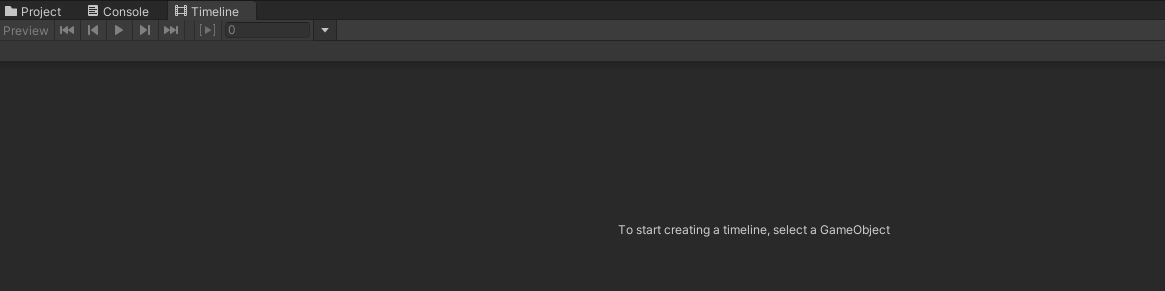
Then, we are going to start animating our cube directly on the timeline, to do so, Open up the Timeline window by going to Window > Sequencing > Timeline.
And let’s create an Empty GameObject in our Hierarchy Window, by right clicking and select “Create Empty”. Let’s rename that new empty Game Object to “Timeline”, that would work as the controller of our scene.
While having our “Timeline” object, go to the Timeline window and click on “Create” on the following option.

Then, as you do with making new animations, a prompt will show up asking you to name your .playable object and save it in a location within your project, you can name it as you want, I name it “cutscene”.
Once created, click on the three dots that appear in you animator by default, and delete it
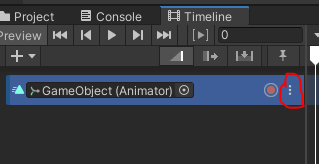
Then, right click on that space and create a new “Animation Track”. This track on Timeline, will handle the animations in our cube. Since this is an entirely new project, the cube doesn’t have animation, so in this example we are going to animate it ourselves.
Drag and drop your 3D cube into the “GameObject {Animator}” of the Animation Track. This will assign the 3D cube to the track and will let us animate it.
If we hit the red circle in our track, we are going to “Record” whatever it happens with our 3D cube, in this example, hit the Record button, and move the 3D cube around every 40 or 60 frames, then change directions.
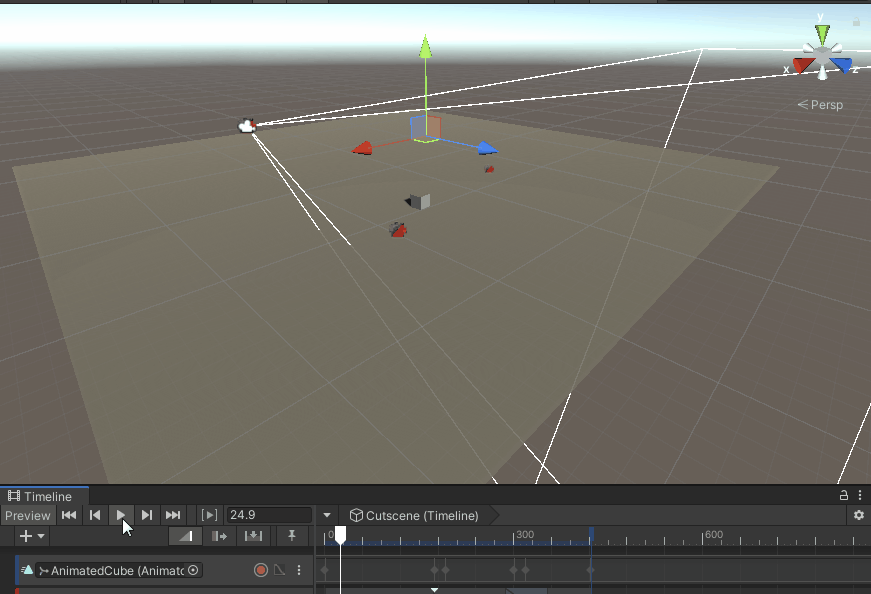
Please not that at the bottom, the keyframes are marked where the movement stoped and continue.
Now we are using Timeline, if we wanted to involve more objects in our shot, we would need to add more “Tracks” and add the animation when needed.
Now, to add Cinemachine to our project. We need to select our “Main Camera”, and in the Inspector window, click on “Add Component” and look for “CinemachineBrain”
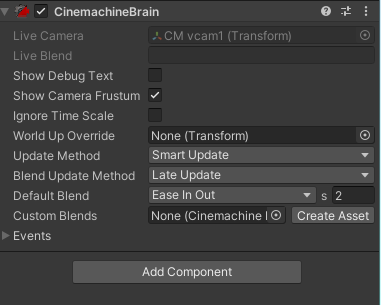
We don’t need to do anything else with our Main Camera, but this will be used as the “Main controller” of the rest of our Cinemachine cameras.
What we are going to do, as in cinema, when there is an important scene and there is some shots from different angles, and different cameras at the same time, we are going to create those extra cameras and let them know what we want from them.
Let’s create our first Virtual Camera, by right clicking our Hierarchy Window and select Cinemachine > Virtual Camera.
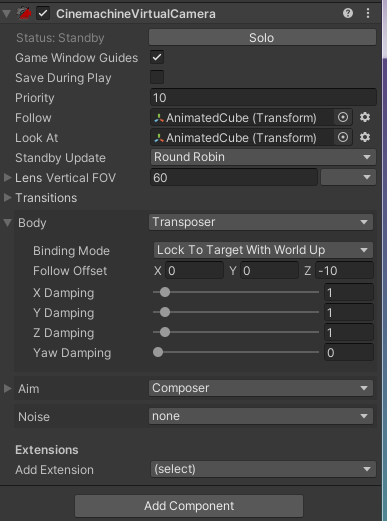
Note: This might cause that your main camera end up not where it was before, but you can re position it whenever you want, let’s move around the Virtual Camera in an angle you like, and you will notice that there is a component on the Inspector Window called “CinemachineVirtualCamera”, let’s add our animated 3D cube to the “Follow” and “Look At” properties by drag and drop our cube into those fields.

You might notice that in the “Game” Window, when you have your virtual camera selected it might look something like this:
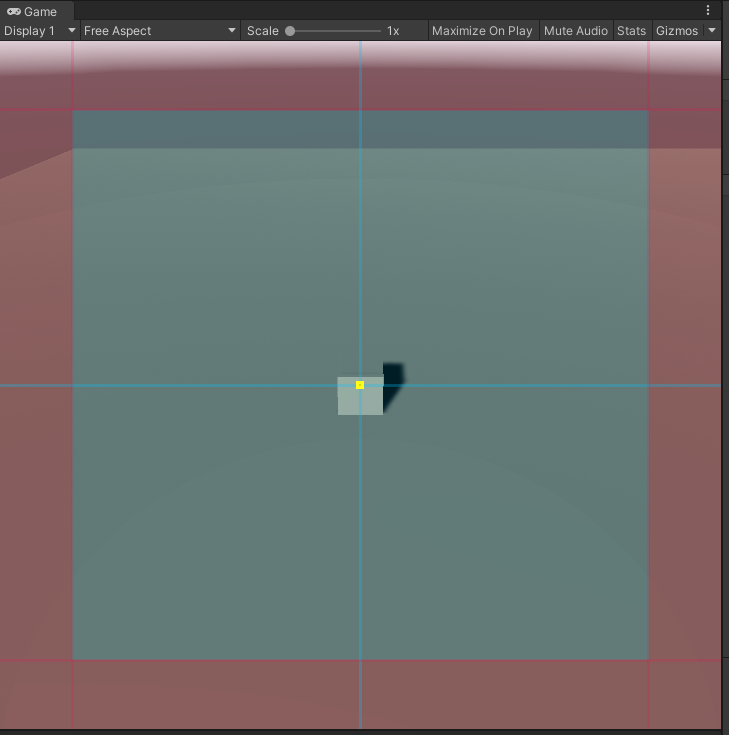
Those guidelines will help you in the composition of your shot, and the red border it’s a guide to let you know that the object will be harder to see in those places.
Now, if you click Play in Unity, you will notice that your 3D cube moves around for the animation, and the virtual camera follow it around.
That’s a very easy example of how to use Cinemachine, now for mix it up with Timeline, let’s select the “Timeline” game object from our Hierarchy Window, and Drag and drop our “Main Camera” object to create a Cinemachine Track.
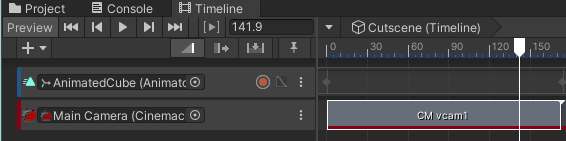
Then, we can adjust where the virtual camera will come into play during the shot and by how long, but the fun begins when we add more virtual cameras.
Let’s add two more Virtual cameras by right clicking the Hierarchy window and select Cinemachine > Virtual Camera
Position your second virtual camera where you pleased and on the CinemachineVirtualCamera of that second virtual camera, let’s make it just “Look At” our cube, but not follow it
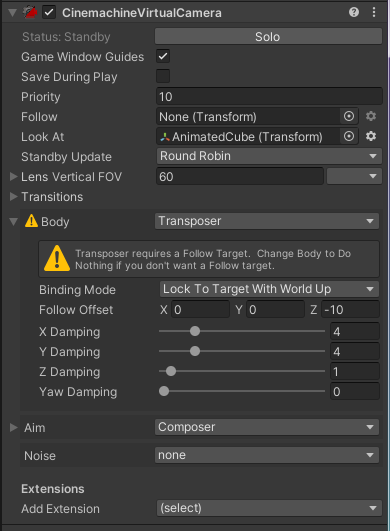
This will give the effect of a stationary Camera that just follows a target in movement.
And for the Third virtual camera, I position it in a different place in the scene and gave it this properties
It will work like the first Virtual Camera but from a different angle.
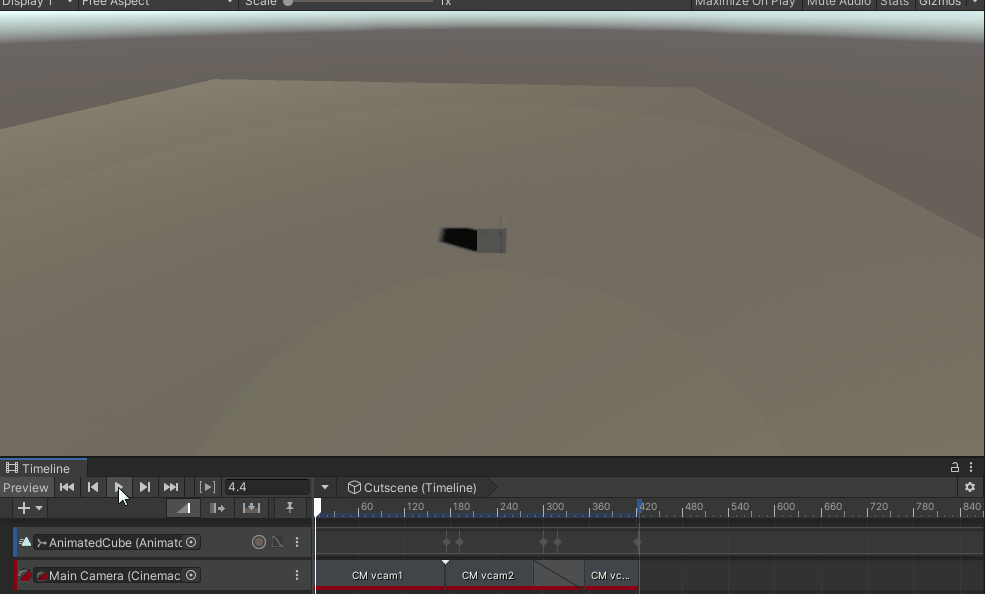
Now, if we go back to the Hierarchy Window, and select our “Timeline” game object, we can add the rest of the virtual cameras to our “Cinemachine Track”

And if we adjust the duration of the virtual cameras in the Cinemachine Track, we can get some very interesting result, if we try to overlap two virtual cameras, it will result on Timeline, interpolating thos two cameras into a smooth transition. Let’s see the result:
That’s it, you just created your fist cinematic using Unity Cinemachine and Timeline.
From now on you can play around with these basic concepts and explore the different types of Cameras from Cinemachine, and Tracks from Timeline to get some really impresive results.
Hope you had like it this little tutorial and remember that you can get the whole project in my github repository.
Happy gamedev!