Unity Multiplayer Tutorial using Photon PUN
Photon is a networking engine and multiplayer platform that can handle all the requests on their servers, and through the Unity (or other game engines) we can consume it, add the logic in our projects, focus on gameplay and features and let the part of the networking to Photon.
PUN (Photon Unity Networking) is one out of the box solution for handling multiplayer on Unity Projects, in this tutorial, we are going to lear how to:
- Create a Room for other players to connect to
- Having up to 20 players connect to the same game
- Learn how can the players can interact with each other through custom actions and affect our game.
At the end of this tutorial, we are going to learn how to create a simple game with this features, and learn how we can scale it to add more features in the future.
I recommend that you check out the Github repository for this tutorial if you want to get more details as you read by, but we are still going to go step by step about how to achieve a Unity game with a multiplayer feature, you can also check out a live version of this tutorial here
First, we would need to create a Photon account over here
Once we are done with that, we can go To Dashboard > Public Cloud > Your Applications and we are going to click on “Create a New App”
We are going to choose “Photon PUN” for “Photon Type” and write a unique name on the field, after that we can fill out the rest of the optional fields and click on “Create”
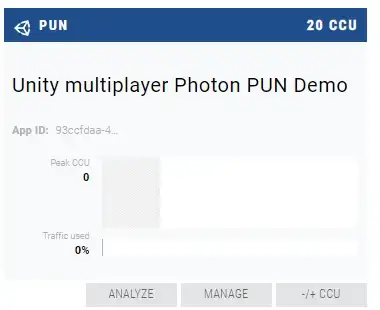
This will create our Application on Photon, that we will need for the next steps on this tutorial, whate we want from here is the “App ID” if we click on the numbers, the rest of the Id will show up, and we can copy it for later use.
Here on the dashboard we can also get access to the metrics of how the app has been used, how many CCU (Concurrently Connected Users) have been connected accross all the rooms in your game.
Photon have a free tier that lets us test it (or go live if we want) with 20 CCU and we can choose to upgrade whenever we want, I personally think this is a great deal as Proof of concept and small games (that’s what we end up using on Dots of War), also if you want to upgrade to 100 CCU the Photon PUN 2+ Unity asset includes 100 CCU for 60 months at $95 USD you can also check out the pricing plans on their official website.
And if you feel the need to have more control over what’s going on on the server side of things, they have a solution for Self-Hosted servers, the same implementation but instead of going to theirs servers, it goes to yours.
Anyway, let’s go back to the tutorial, Let’s open up Unity and create a new 3D project.
Part 1: Creating a Lobby
Go to Window > Asset Store (make sure you are logged in), and search for “Photon Pun” in the searchbar. Here we are goint to select “PUN 2 - Free” and Import it to our Project.

Once we finish up importing the package, a window like this will show up:
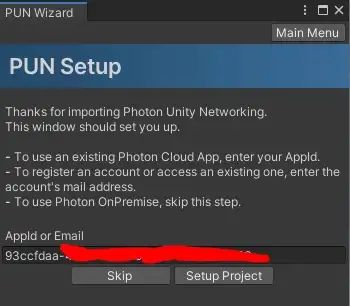
In the AppId we are going to paste the AppId we got from the Photon platform that we just created, and we are going to click “Setup project”, this will link our Unity app with our Photon app.
If we go to Window > Photon Unity Networking > Highlight Server Settings we can configure our Unity app a little more.
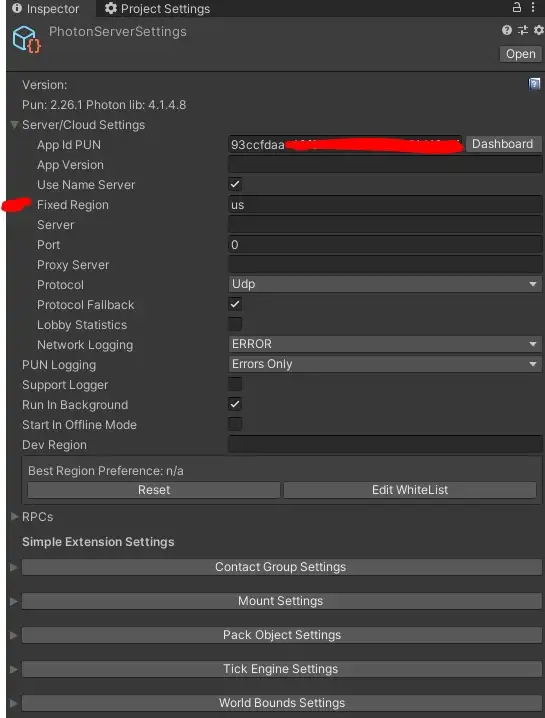
For this Tutorial, I changed the “Fixed Region” property to “us” (United states) that will make all the connection to my Unity Game throught that region.
The way regions works on Photon is that it will evaluate which region is the best fit for the player that is connecting on our Game, that way it can reduce the lag and have an overall better experience in-game for all players.
However, since this is a demo, and it can happen that somebody in Australia and somebody in Canada can connect at the same time, if we leave the “Fixed Region” as blank, it will evaluate that the each person will be part of different region,and they wouldn’t be able to be part of the same Room and thus, not being able to play together.
You can read more about Photon Regions over here.
Creating a multiplayer game from scratch can be overwhelming, so for this Tutorial, we are going to use some of the pre-made assets from this package, and implment the bare minimum in our own in order to make it easier to diggest.
Let’s re-name our default scene as “Lobby”

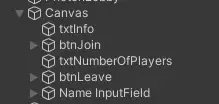
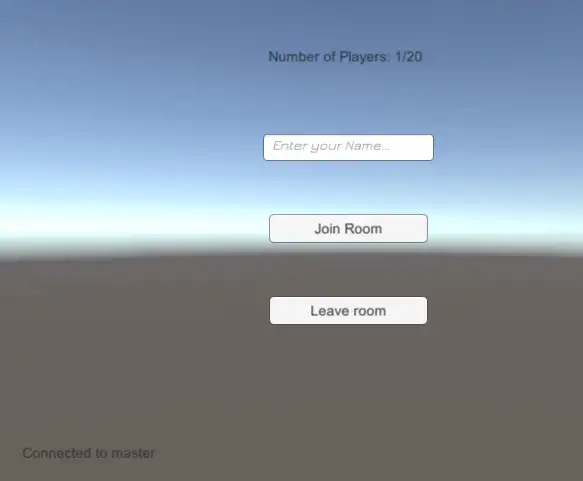
In the lobby, there is going to be 5 elements to a Canvas.
“Number Of Players” and “Status Text” are going to be replaced with their values at runtime, being the number of players that are connected to the app at the same time (CCU) and “Status text” will help us to show up in which part of the process our game is on, this is helpful because when we are debugging multiplayer games ourselves, we need a builded version of the game and our Editor version.
“Enter your Name…” it’s an input text that will write up a PlayerPref with our name to differentiate when we are online.
“Join Room” will start the process of Joining or Creating a Room, and if everything works right, will change us to the gameplay scene.
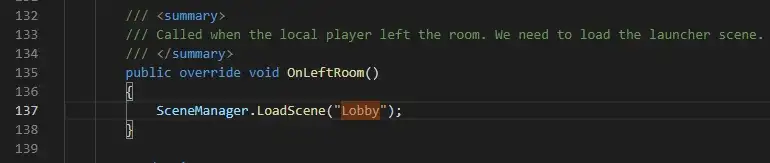
“Leave Room” will disconnect us from the current Room.
For creating this simple menu, I Right clicked on the Hierarchy Window, and select UI > Canvas and inside of the canvas I added the rest of the controllers.
On The Hierarchy Window, create an empty object by right clicking on it and click on “Create Empty”. Rename it to “NetworkController” and look for a component called “NetworkController” (From the Photon assets) and attach it to your empty GameObject.
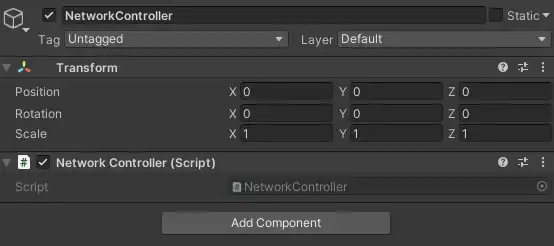
The NetworkController class will connect to Photon at the Start() event using our configured settings.
All our Scripts for this tutorial will be on the Assets > Scripts Folder.
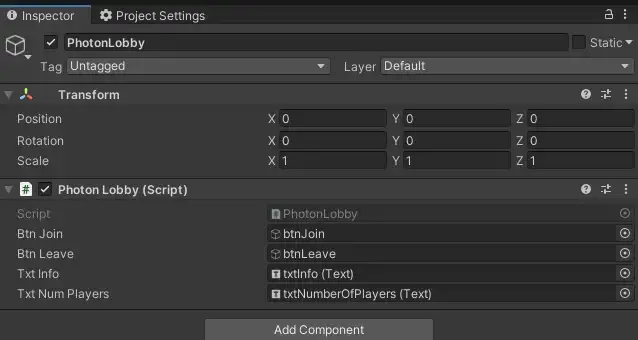
Let’s create an Empty Object and Rename it PhotonLobby, and add the Script from that Folder called PhotonLobby.cs, we are going to fill it out with elements from our Canvas.
Now, let’s add the “OnClick” events from our btnJoin Button and btnLeave Button like this:

btnJoin Button OnClick Event

btnLeave Button OnClick Event
Also, let’s make sure our “Name InputField” looks like this in the inspector
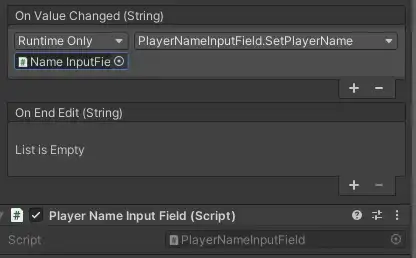
“Player Name Input Field” is a script in the Photon Folder
The PhotonLobby class it’s commented so feel free to read the explanation of each method, but basically it show and hide the btnJoin/btnLeave button as needed in order to prevent trying to connect multiple times at the same Room.
It also:
- Show up the number of players connected to our Unity game
- Try to Join a Random Room, but if it fails to do so (because there is none or otherwise) it will Create a new Room.
- If it fails to create a Room, it will try again.
Let’s create a new Empty GameObject and rename it to “PhotonRoom”, and add the component “PhotonRoom” to it from the Assets > Script Folder, and configure it like so:
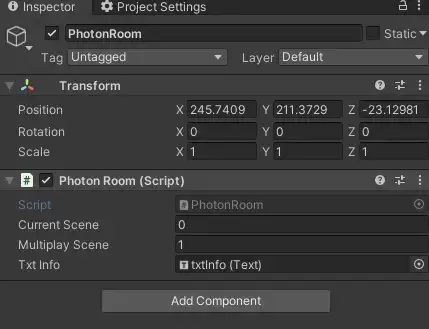
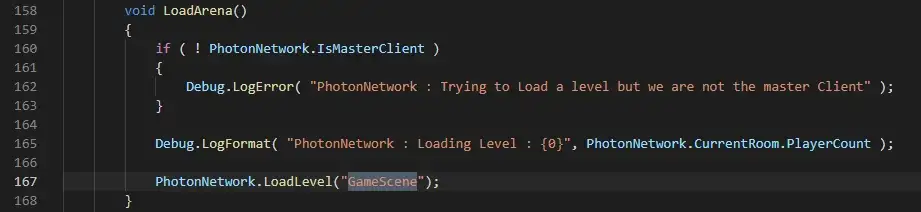
The PhotonRoom class will activate once we are connected to a Room. It takes as properties indexes from the scenes of the projects, being Current Scene (the Lobby) Index 0, and “Multiplayer Scene” 1 (our GameScene scene that we will create in a bit)
This class waits for the event “OnJoinedRoom” to be triggered when we sucessfully connect to or Create a Room. And loads up which scene is the one with the actual game on it.
That’s the first part, creating the Lobby, now let’s create a new Scene and call it “GameScene”
Part 2: Creating a Game Scene
Since this Tutorial is focused on how to implement PUN, we are going to use some of the Prefabs for the Gameplay part of this demo.
Let’s create an Empty Game Object in our GameScene Hierarchy window, and we will add the Component GameManager.cs to it

Let’s add on “Player Prefab” a Prefab made by Photon called “My Robot Kyle -done-” that is on the Assets/Photon/PhotonUnityNetworking/Demos/PunBasics-Tutorial/Resources Folder.
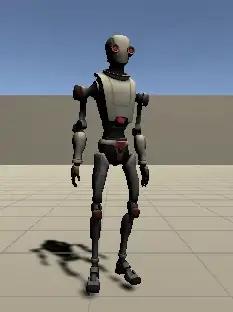
This is Kyle
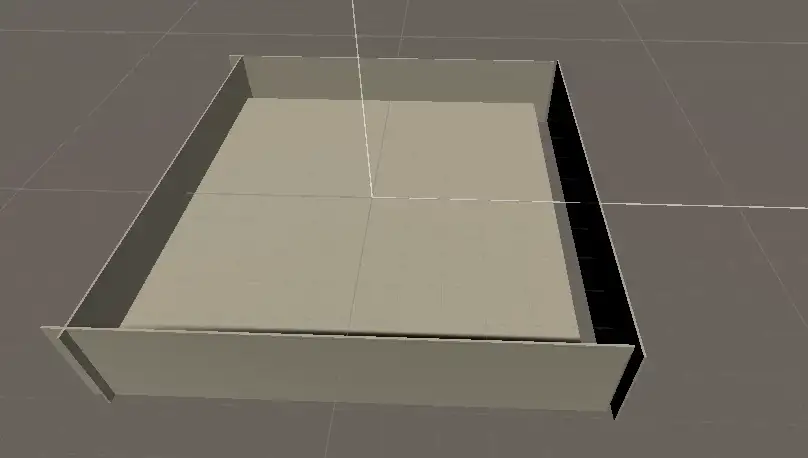
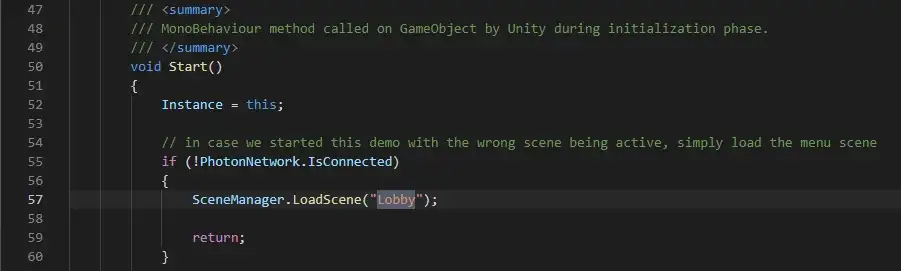
On GameScene, let’s create a Plane on Position 0,0,0 so kyle don’t end up falling once it’s spawned.
I ended up creating a basic scene with a plane and walls so the players don’t fall over
Now, we are going to change a little bit GameManager.cs , we are going to change the name of the scenes in the script to match the ones we have in our project like so:
GameManager makes sure that the player is connected to a room, if it’s not, it will load up the “Lobby” scene where we connect to a Room. If it it’s connected, it will load up the “GameScene” scene.
So now, before testing, let’s go to File > Build Settings and make sure our scenes are added to the Settings like so and hit the Play Button on Unity.

We are going to be redirected to the Lobby like this:
And if we fill out the Name input with our name and click Join Room, we will see something like this:
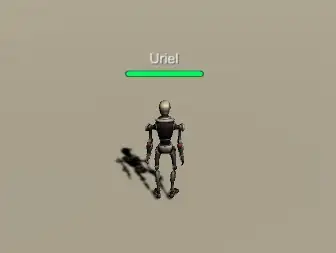
That is, if we made a ground for our robot to land on.
Want to see something cool?
Let’s test the game with two players connected at the same time, for this, we will need to build our game, I recommend trying with a standalone windows or mac version first since it’s easier to iterate that with other builds, but Photon is platform agnostic, so it any platform should be working the same.
So let’s go to File > Build Settings we choose the PC, Mac & Linux Standalone platform and we click on “Build”, and we wait for the build to be complete.

Left Unity Editor, Right Standalone Build.
Then we launch the .exe project and the editor at the same time. That’s pretty much what’s needed for having two or more players connected to the same Game with Unity using Photon PUN.
You might have noticed those extra buttons I added on the GameScene, that’s the final topic I would like to talk about.
How can players interact with each other?
In this tutorial, we have different players in the same room, but what about interacting with each other through the game?
To achieve this, we will need something like:
- A Player does an action
- The action get’s sended over to the server
- All the rest of the Players (clients) receive the info of that action and it get’s replicated on their own game.
This is what’s called a Remote Procedure Calls or RPC this is basically a way for a method to be invoked on the clients of the same room.
For this tutorial, we are going to do a really simple and quick example of an RPC Method, and you can learn about all the other options for them or came up with different implementation reading the official documentation.
On our GameManager object, let’s add our own script from Assets > Script called GamePlayController to it, we also are going to txtNumberToIncrease Text GameObject from the Canvas to it, and add a Photon View Component with the Add Component button while selected.
You GameManager GameObject should look like this:

In the Canvas, I also added a new UI Button and called it btnAction, and on their OnClick Event I set it up to the IncreaseNumber Method from the GamePlayController class referenced by the GameManager GameObject
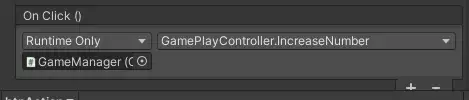
The GamePlayController Class have a very simple implementation:
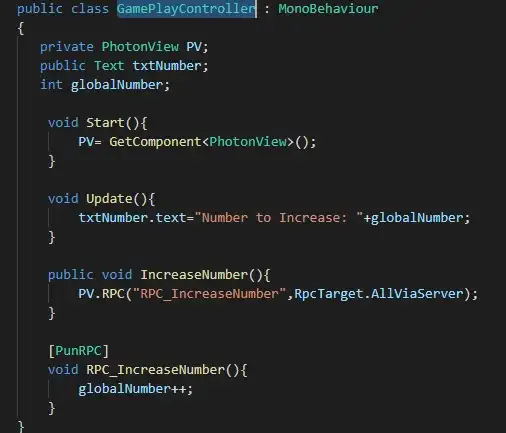
- It References the PhotonView Component at the Start() Event, needed in order to call and receive RPC
- It reflects the globalNumber variable in the Update() Event to show always the latest value.
- The IncreaseNumber() Method will locally call our RPC Method (marked with [PunRPC], the second parameter “RpcTarget.AllViaServer” refers that it will call the RPC_IncreaseNumber() Method for all the clients, but firstly will reach out the main server, so all the clients will receive the same message in order.
- Finally the RPC_IncreaseNumber Method will be called by Photon to execute the order, in this case, increasing the globalNumber variable.
While clicking on any of the “Increase Number” buttons, the Number to increase goes up for all the clients
That’s it! you just created a multiplayer game!
Where to go from here?
RPC are super powerfull, and need to be designed in a way that makes sense for your game, you can pass parameters to it, serialize information through clients, and make all kinds of actions with them, this tutorial just cover the very basic for it just to get you started and not feel overwhelm by all this new information.
While designing your game you should take into consideration what kind of actions would the player be able to do, and how would the rest of the players in the room are going to be affected by those actions.
What’s something to keep in mind while using Photon?
As you can see, implementing Photon in your Unity game is very easy, you have your free tier to prototype and play around with it, but you should also think on the way it can scalate and design a business plan on how the game could be profitable to pay for the plans if there is need of increasing the number of CCU in your game.
Personally, I think it’s a great service, having the option to relay on a third party service to handle all the networking events, scalability, downtimes, responses, regions, match making, it’s truly a great way to get started in the world of multiplayer games, that doesn’t mean that you can’t implement your own solution instead of using the ones on Photon, it’s not an all-or-nothing, you can implement some features and having the rest of the features being handled by yourself.
I hope that this tutorial has been helpful, and if you want to check out the source code for it, feel free to do so in the Github Repository.
Happy gamedev!